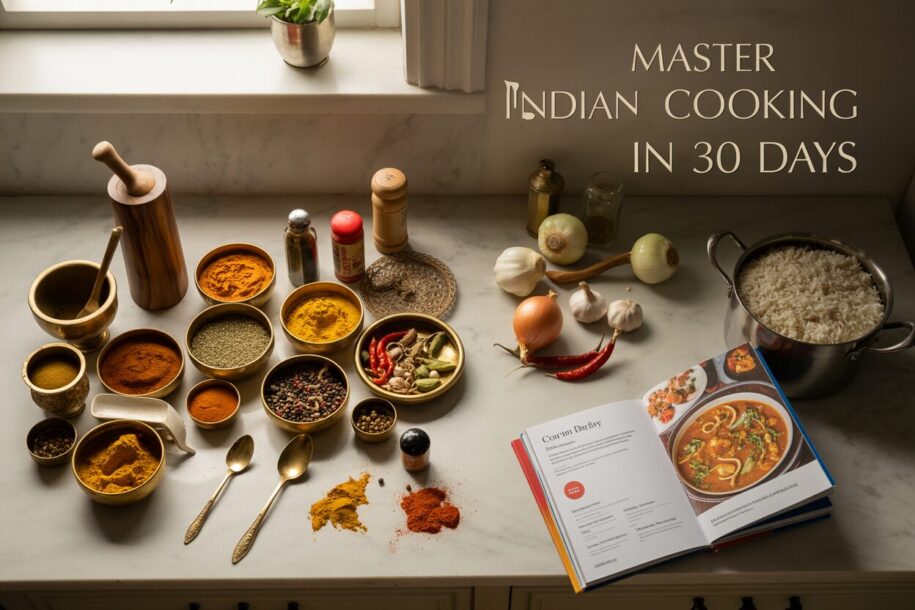
Learning Indian cooking might feel overwhelming with its complex spices and unfamiliar techniques, but you can master the basics in just 30 days with the right plan. This beginner’s guide is designed for home cooks who want to move beyond ordering takeout and start creating authentic Indian dishes in their own kitchen.
You’ll start by building your essential spice collection and learning the fundamental cooking methods that form the backbone of Indian cuisine. We’ll walk you through mastering rice and bread basics, then guide you through the main curry categories so you can cook confidently for family dinners or dinner parties.
By the end of 30 days, you’ll have a structured practice schedule, know how to avoid common mistakes, and feel comfortable experimenting with flavors that once seemed mysterious.
Build Your Essential Indian Spice Arsenal
Stock up on 10 must-have whole spices for authentic flavors
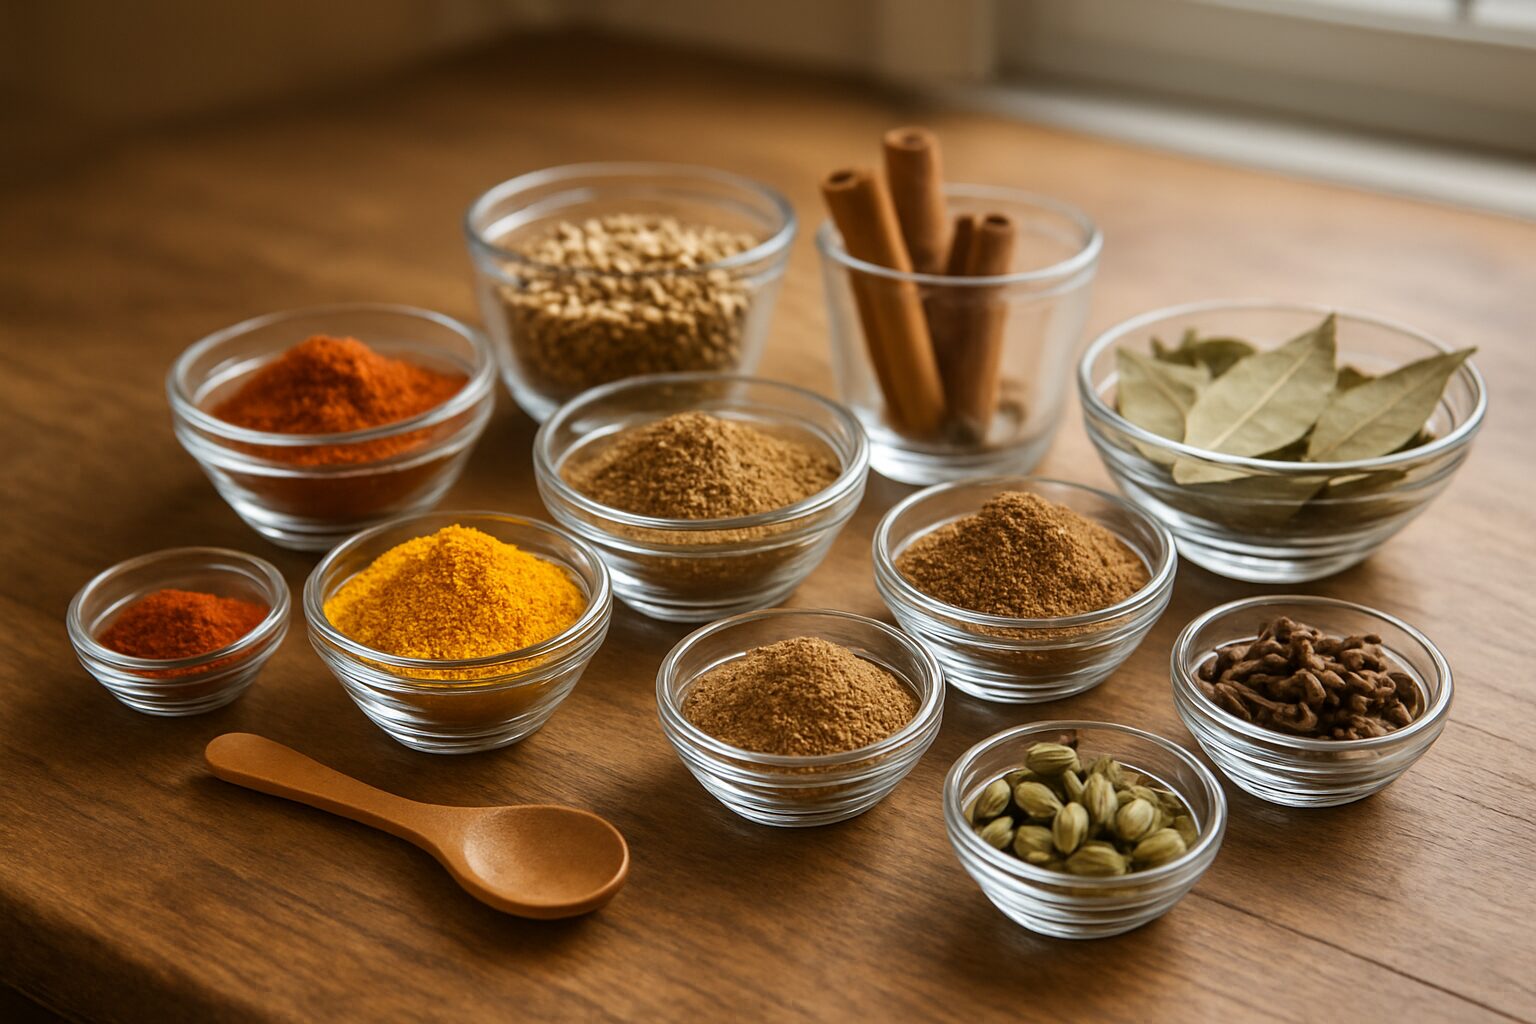
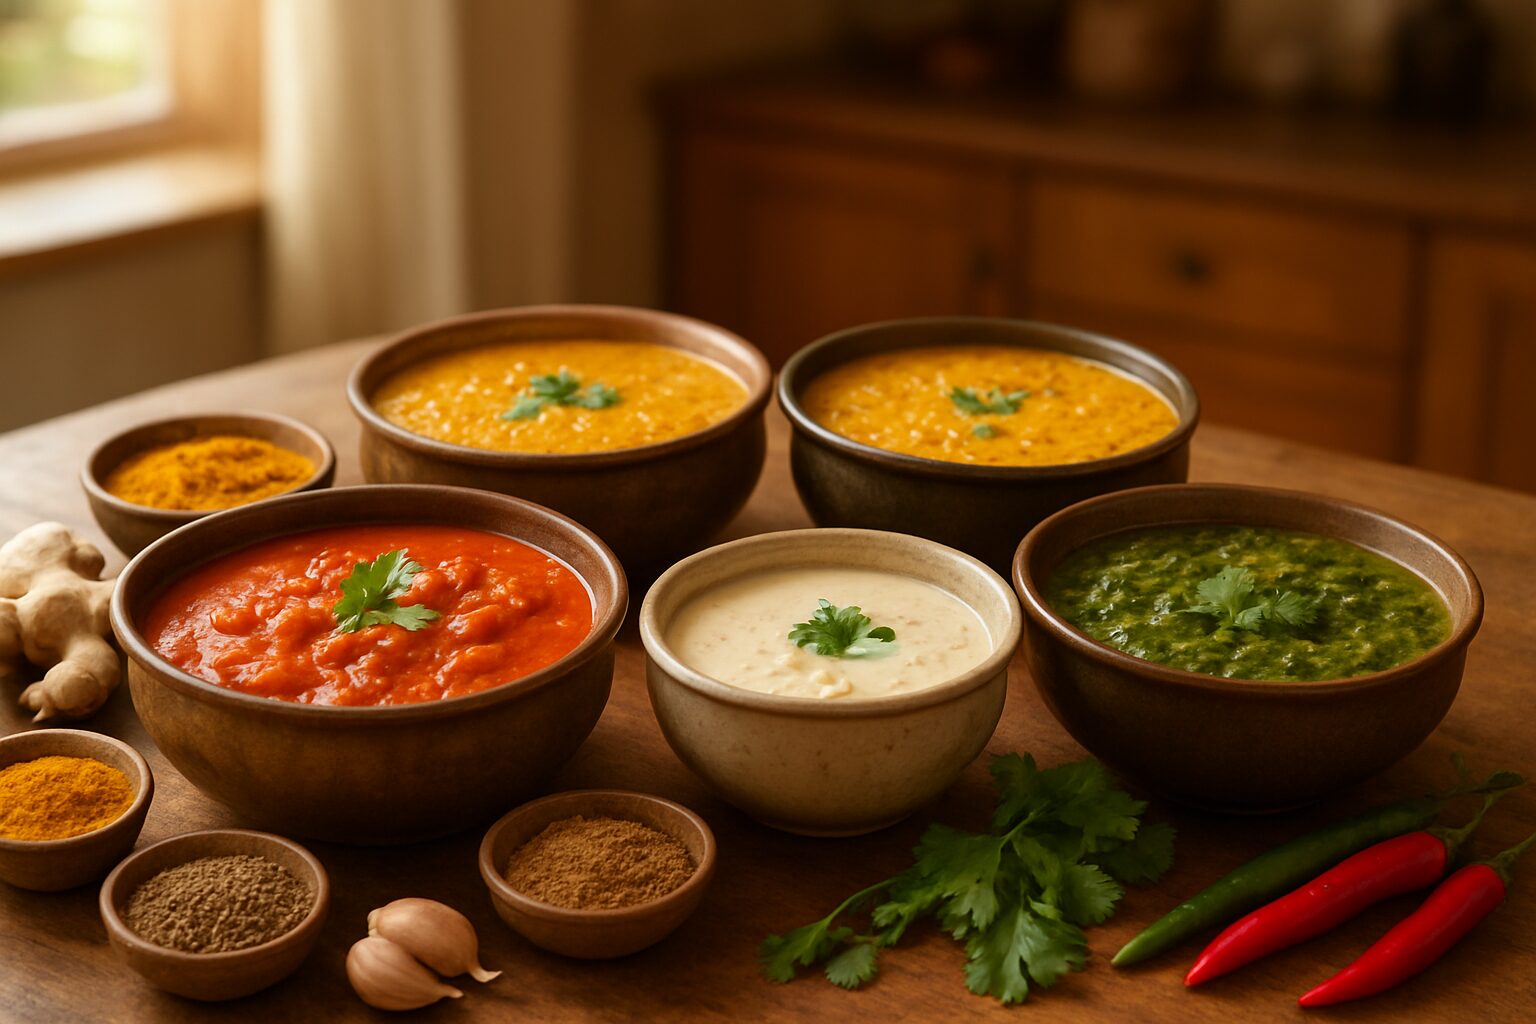
Your spice collection forms the backbone of every great Indian dish. Skip the pre-ground powders from the grocery store – whole spices pack more punch and stay fresh longer. Here are the ten essentials that’ll transform your kitchen:
Cumin seeds (jeera) bring earthy warmth to almost everything. Coriander seeds (dhania) add a subtle citrusy note that balances heat. Mustard seeds (rai) create that distinctive pop and crackle in South Indian dishes. Fenugreek seeds (methi) deliver a maple-like sweetness that’s absolutely unique.
Cardamom pods come in two varieties – green for sweet dishes and black for savory curries. Cinnamon sticks and whole cloves add depth to biryanis and meat dishes. Black peppercorns provide clean heat without overwhelming other flavors.
Fennel seeds (saunf) contribute a licorice-like sweetness that’s perfect for digestive teas and fish curries. Finally, red chilies – preferably Kashmiri for color and mild heat, or birds-eye chilies for serious fire.
| Spice | Flavor Profile | Best Used In |
|---|---|---|
| Cumin seeds | Earthy, warm | Dal, vegetables, meat |
| Coriander seeds | Citrusy, mild | All curries, chutneys |
| Mustard seeds | Sharp, pungent | Tempering, South Indian dishes |
| Cardamom | Sweet, aromatic | Rice dishes, desserts |
Buy these from Indian grocery stores or reputable online suppliers. Store them in airtight containers away from light and heat. They’ll stay potent for up to two years when stored properly.
Master the art of tempering and blooming spices
Tempering (called tadka or chaunk) unlocks the full potential of your spices. This technique involves heating oil or ghee and adding whole spices in a specific order to release their essential oils and create layers of flavor.
Start with a heavy-bottomed pan or small saucepan. Heat two tablespoons of oil or ghee over medium heat until it shimmers but doesn’t smoke. The oil temperature matters – too hot and your spices burn, too cool and they won’t bloom properly.
Add spices based on their cooking times. Mustard seeds go first – they’ll pop and dance in the hot oil within 30 seconds. Next come cumin seeds, which should sizzle immediately. Follow with curry leaves if you have them (they’ll splutter dramatically), then dried chilies, and finally more delicate spices like fennel or fenugreek.
Each spice should sizzle and release its aroma before you add the next one. The whole process takes 1-2 minutes max. You’ll know it’s working when your kitchen fills with incredible smells and the spices turn a shade darker.
Pour this aromatic oil directly over cooked dal or vegetables, or use it as the base for building curries. The difference in flavor between bloomed and uncooked spices is like night and day – this one technique will elevate every dish you make.
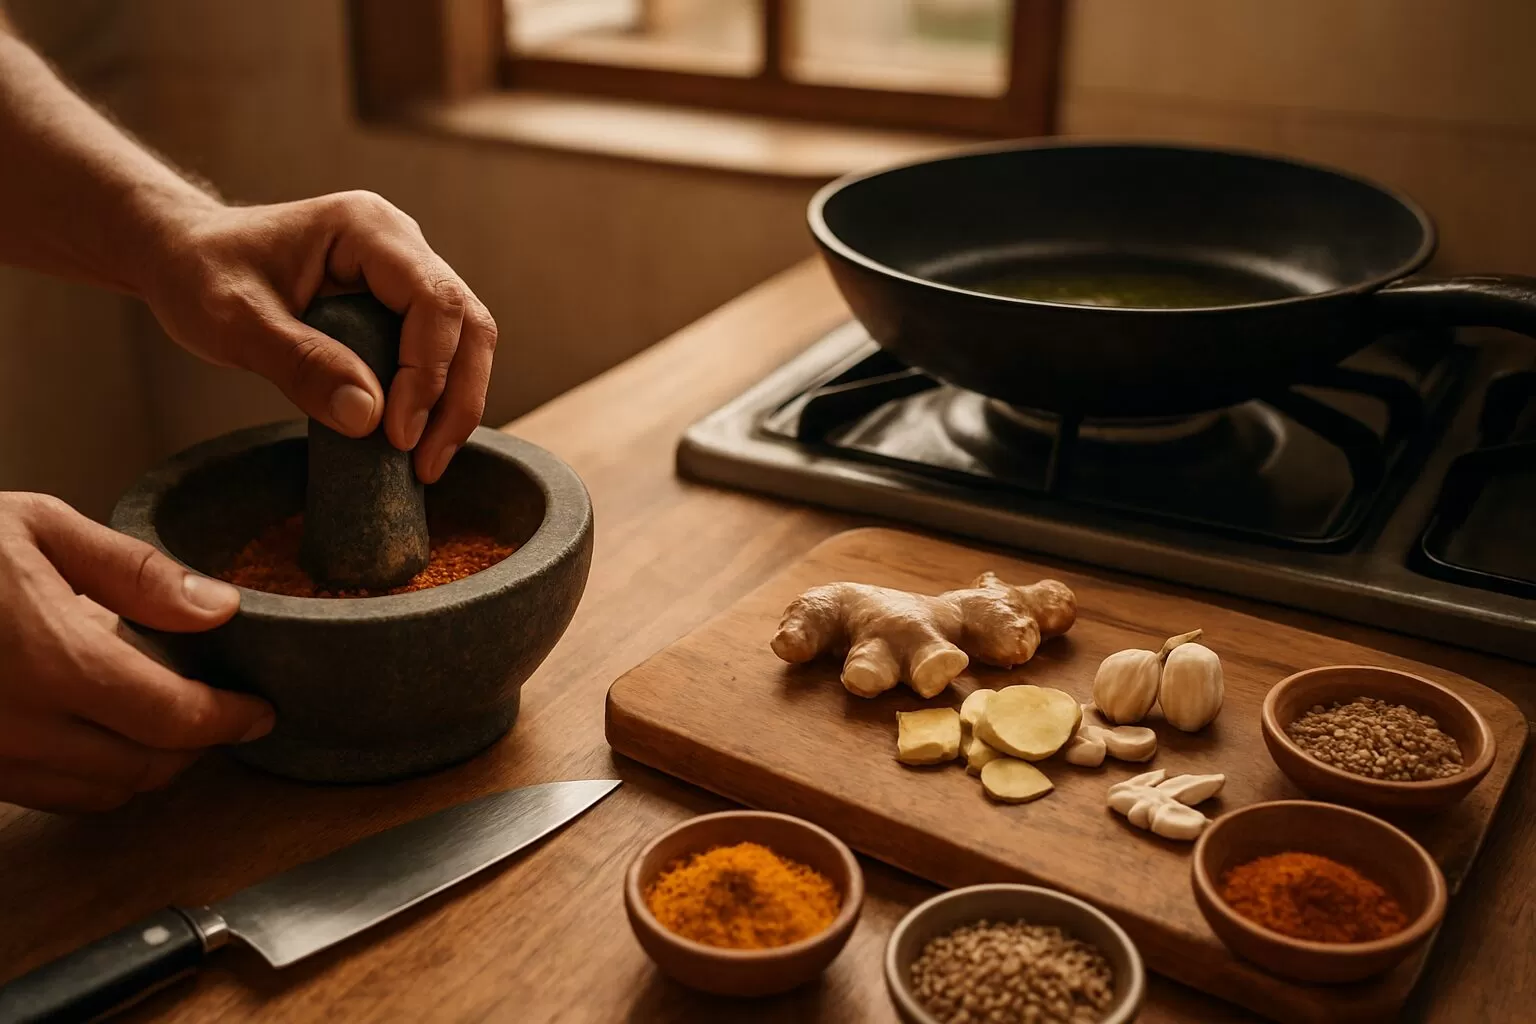
Create your own spice blends and garam masala from scratch
Fresh spice blends beat store-bought versions every single time. Making your own garam masala takes fifteen minutes and lasts for months while delivering flavors that’ll make your neighbors knock on your door.
Basic Garam Masala Recipe:
- 2 tbsp green cardamom pods
- 1 tbsp black peppercorns
- 1 tbsp cumin seeds
- 1 tbsp coriander seeds
- 4-5 cloves
- 2 black cardamom pods (optional)
- 2-inch cinnamon stick
- 1 nutmeg (grated)
Dry roast each spice separately in a heavy pan over low heat until fragrant – about 2-3 minutes per spice. Watch carefully as they can go from perfectly toasted to burnt quickly. Let them cool completely before grinding.
Remove seeds from cardamom pods and grind everything together in a spice grinder or coffee grinder dedicated to spices. Sift through a fine mesh to remove any large pieces. Store in an airtight container for up to six months.
Quick Curry Powder Blend:
- 2 tbsp coriander seeds
- 1 tbsp cumin seeds
- 1 tsp fennel seeds
- 4-5 dried red chilies
- 1 tsp turmeric powder
Follow the same roasting and grinding process. This blend works beautifully for quick weeknight curries when you don’t have time for individual spice tempering.
Making your own blends lets you control heat levels, adjust flavors to your taste, and avoid the stale, dusty quality of commercial spice mixes.
Learn Fundamental Cooking Techniques in Week One
Perfect the Base of Onion-Tomato-Ginger-Garlic Paste
Every great Indian dish starts with a solid foundation, and mastering this base will transform your cooking overnight. The onion-tomato-ginger-garlic paste forms the backbone of countless curries, gravies, and dry dishes.
Start by roughly chopping 2-3 onions, 3-4 tomatoes, a thumb-sized piece of ginger, and 6-8 garlic cloves. Heat 2-3 tablespoons of oil in a heavy-bottomed pan and add the onions first. Cook them slowly over medium heat until they turn golden brown – this takes about 8-10 minutes and builds the sweet, caramelized flavor that makes restaurant-style dishes so addictive.
Add ginger-garlic paste next, cooking for 2 minutes until the raw smell disappears. Toss in the tomatoes and cook until they break down completely, creating a thick, jammy consistency. The mixture should leave oil around the edges – this means your base is ready.
Here’s the game-changer: make large batches and freeze them in ice cube trays. Pop out 2-3 cubes whenever you need a quick curry base. This simple trick saves 15 minutes of prep time for every dish you make.
Master Three Key Cooking Methods: Tadka, Bhuna, and Dum
These three techniques are your gateway to authentic Indian flavors. Think of them as the holy trinity of Indian cooking methods.
Tadka (Tempering) is the magic that brings spices to life. Heat oil or ghee in a small pan, add whole spices like cumin seeds, mustard seeds, or curry leaves, and let them sizzle for 30 seconds. The oil captures all the aromatic compounds, creating an intense flavor base. Pour this sizzling mixture over cooked dal, rice, or vegetables for an instant flavor boost.
Bhuna means to roast or sauté ingredients until they’re perfectly cooked and the oil separates. When making a curry, keep stirring your spice paste over medium heat until it darkens and releases oil around the edges. This process removes the raw taste from spices and concentrates flavors dramatically.
Dum cooking involves slow-cooking food in its own steam. Place your curry in a heavy-bottomed pot, cover with aluminum foil, then place the lid tightly. Cook on high heat for 2 minutes, then reduce to lowest heat for 45 minutes. This technique creates incredibly tender meat and allows flavors to meld beautifully.
Understand Heat Control for Different Indian Dishes
Heat management separates good Indian cooks from great ones. Different dishes need different heat levels, and getting this wrong can ruin hours of work.
| Dish Type | Heat Level | Cooking Time | Key Indicator |
|---|---|---|---|
| Tadka | Hi | 30-60 sec | Spices sizzle |
| Onion base | Med | 8-10 min | Golden brown color |
| Spice paste | Med-low | 5-7 minutes | Oil separation |
| Pressure cooking | Hi to low | Varies | Steam buildup |
Start rice dishes and rotis on medium-high heat, then reduce to low for even cooking. Lentils need gentle simmering to prevent sticking and burning. Vegetable curries work best on medium heat to maintain texture while developing flavors.
Watch for visual cues: when oil starts separating from your curry base, you’ve hit the sweet spot. If spices start smoking or burning, immediately reduce heat and add a splash of water.
Practice Knife Skills for Proper Vegetable Cuts
Consistent knife cuts aren’t just about looks – they ensure even cooking and proper texture in your dishes. Spend time this week perfecting these essential cuts.
For onions: Cut lengthwise (pole to pole) for curries and crosswise for frying. Lengthwise cuts hold their shape better during long cooking, while crosswise cuts break down faster for smoother gravies.
For tomatoes: Remove the core and cut into wedges for chunky curries, or dice small for smooth bases. Always cut tomatoes last to prevent your cutting board from getting slippery.
For ginger-garlic: Grate ginger against the grain using a microplane for the smoothest texture. Crush garlic with the flat side of your knife before mincing – this releases more flavor compounds.
For vegetables: Cut root vegetables like potatoes and carrots into uniform 1-inch pieces. Leafy greens should be roughly chopped, while delicate vegetables like bell peppers need clean, even strips.
Practice the “claw grip” – curl your fingertips under and use your knuckles as a guide for the knife. This keeps your fingers safe while maintaining control. Sharp knives are actually safer than dull ones, so keep your blade properly maintained.
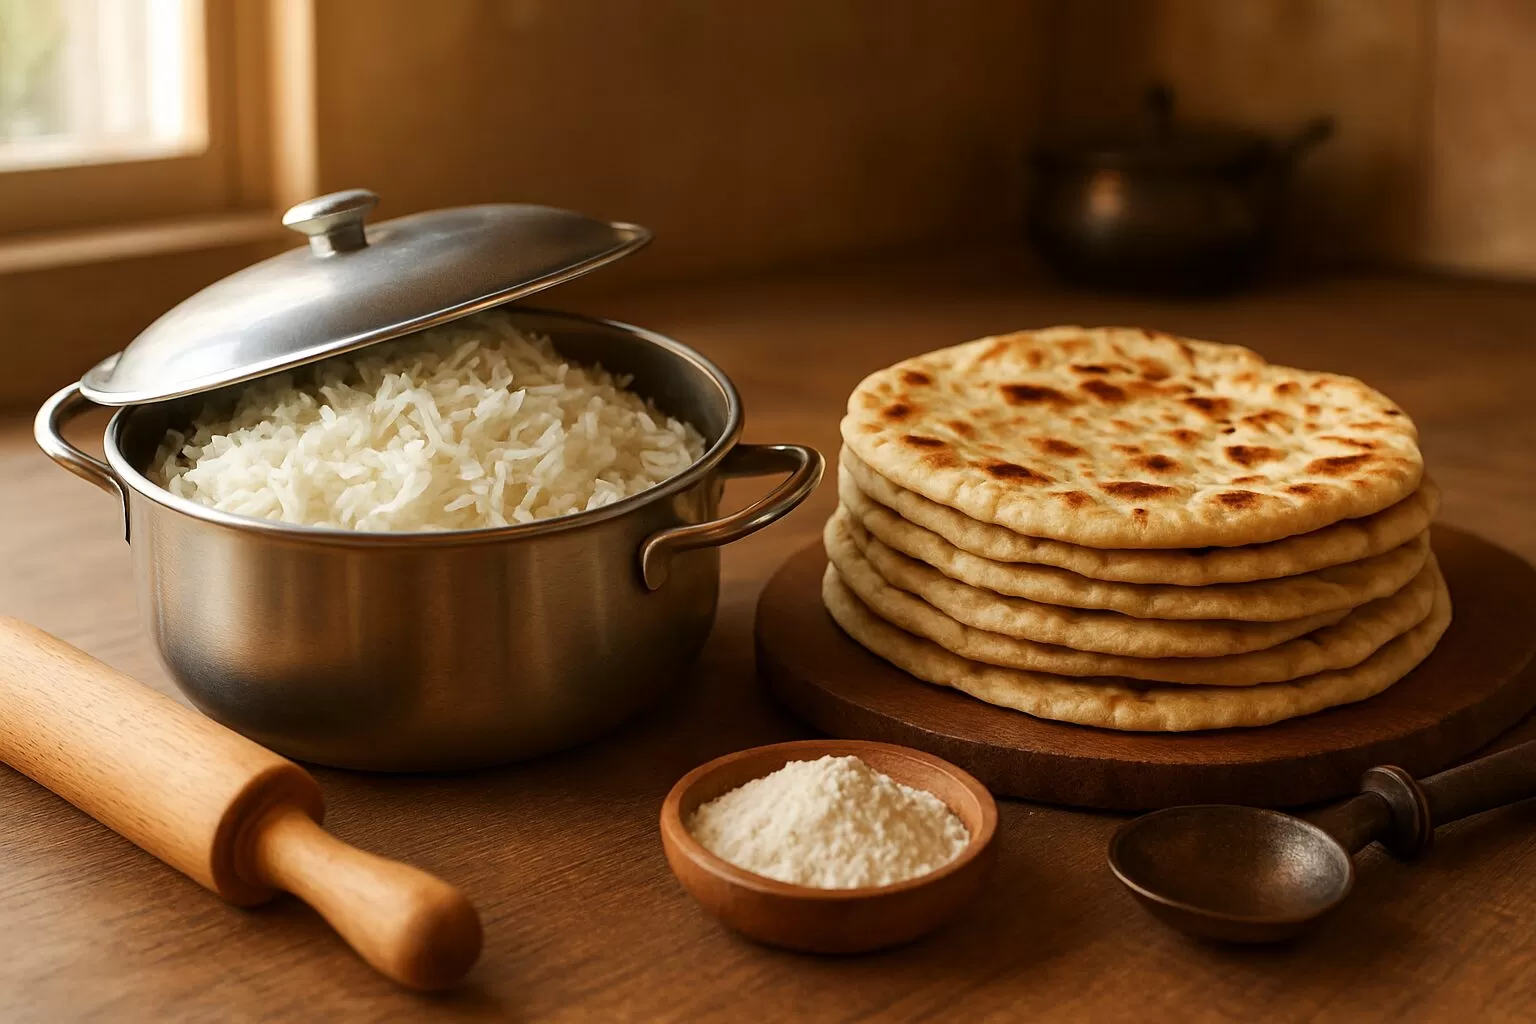
Conquer Rice and Bread Basics by Week Two
Cook perfect basmati rice and simple pulao variations
Getting basmati rice right makes all the difference in Indian cooking. Start by washing your rice until the water runs clear – this removes excess starch and prevents sticky, mushy grains. Use a 1:1.5 ratio of rice to water for fluffy results.
Heat a heavy-bottomed pot with a teaspoon of oil or ghee. Add whole spices like bay leaves, cardamom pods, or cinnamon sticks for flavor. Toss in your drained rice and gently stir for 2-3 minutes until the grains smell nutty. Pour in hot water, add salt, and bring to a boil. Once boiling, reduce heat to low, cover tightly, and cook for 18 minutes without lifting the lid.
For simple pulao variations, sauté onions until golden before adding rice. Try adding frozen peas, cubed carrots, or cashews for texture. Vegetable pulao becomes a complete meal with this technique.
Make soft rotis and parathas from scratch
Fresh bread transforms any Indian meal from ordinary to extraordinary. Start with a simple roti dough using 2 cups whole wheat flour, 3/4 cup warm water, a pinch of salt, and a teaspoon of oil. Mix until you get a smooth, pliable dough that’s not too sticky.
Rest the dough for 20-30 minutes – this relaxes the gluten and makes rolling easier. Divide into golf-ball-sized portions and roll each into thin circles using a rolling pin. Keep them evenly thin to ensure proper cooking.
Heat a cast iron pan or tawa over medium-high heat. Cook each roti for 30-45 seconds until bubbles form, flip, and cook another 30 seconds. For the final puffing step, use tongs to hold the roti directly over an open flame for a few seconds.
Parathas follow the same base but with added fat layers. Roll out the dough, brush with oil or ghee, fold, and roll again. This creates flaky, buttery layers that pair perfectly with curries and pickles.
Prepare quick jeera rice and coconut rice
Jeera rice takes just 20 minutes and elevates simple dal meals beautifully. Heat ghee in a pan, add cumin seeds until they sizzle and darken slightly. This releases their essential oils and creates that signature aroma. Add cooked basmati rice, salt, and gently mix. Finish with fresh cilantro and a squeeze of lemon.
Coconut rice brings South Indian flavors to your table. Toast curry leaves, mustard seeds, and split urad dal in coconut oil until fragrant. Add grated coconut and cooked rice, mixing gently to avoid breaking grains. Season with salt and garnish with roasted peanuts for crunch.
Both dishes work wonderfully as side dishes or light meals. The key is using day-old rice when possible – it holds its shape better and doesn’t become mushy during the tempering process.
Master the art of layered biryani preparation
Biryani represents the pinnacle of Indian rice cooking, combining perfectly cooked rice with spiced meat or vegetables in distinct layers. Start by parboiling your basmati rice with whole spices until it’s 70% cooked – the grains should still have a slight bite.
Prepare your protein separately with a rich masala base. Whether using chicken, lamb, or vegetables, the key is achieving deep, complex flavors before assembly. Marinate meats in yogurt, ginger-garlic paste, and spices for at least 30 minutes.
Assembly requires patience and technique. Layer your partially cooked protein at the bottom of a heavy pot, followed by the parboiled rice. Sprinkle fried onions, mint, cilantro, and dots of ghee between layers. Cover with foil, then the lid to create a tight seal.
Cook on high heat for 3-4 minutes until steam builds, then reduce to lowest heat for 45 minutes. This slow cooking method, called “dum,” allows flavors to meld while the rice finishes cooking in the aromatic steam. Let it rest for 10 minutes before opening – patience here prevents the layers from breaking when you serve.
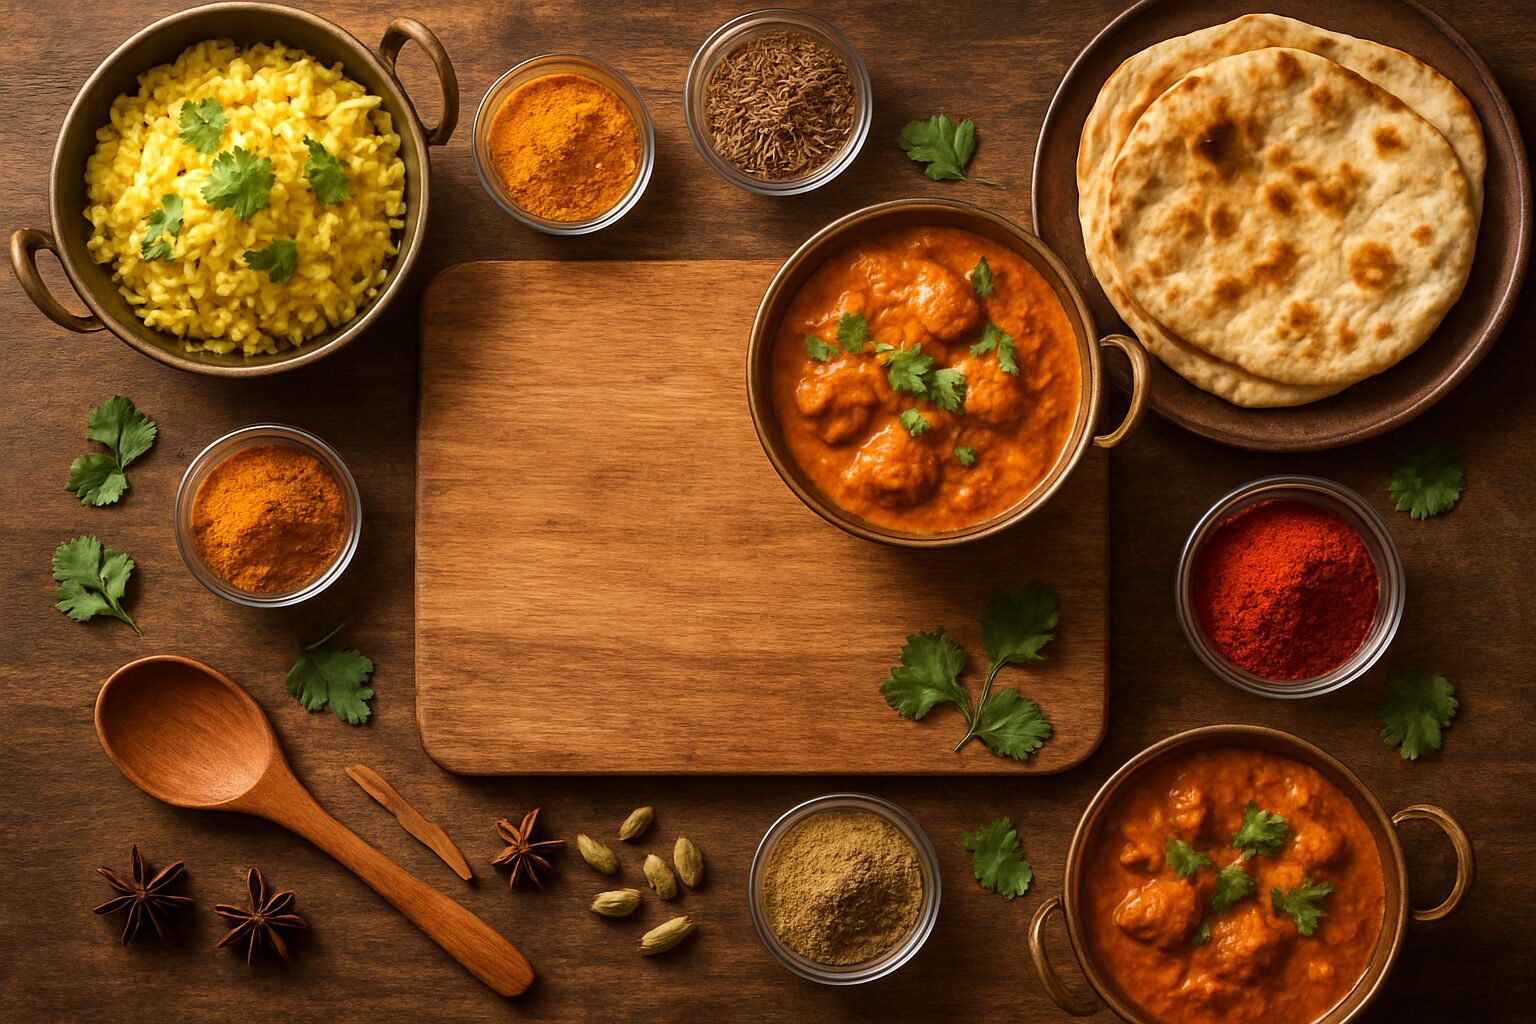
Master Essential Curry Categories in Weeks Three and Four
Create creamy tomato-based curries like butter chicken
Start your curry journey with the crowd-pleasing tomato-based curries that define North Indian cuisine. Butter chicken serves as your gateway recipe because it teaches you the fundamental building blocks of cream-based gravies. Begin by creating a smooth tomato puree using fresh tomatoes, ginger, and garlic. Cook this base until the raw tomato taste disappears and the mixture turns deep orange-red.
The secret lies in tempering your spices properly. Heat ghee in your pan, add whole spices like bay leaves and green cardamom, then introduce your ground spice blend of garam masala, coriander, and cumin. This technique, called blooming, releases essential oils that create depth in your curry.
Master the cream incorporation technique by adding it slowly while stirring constantly to prevent curdling. The final dish should have a silky, restaurant-quality texture that coats the back of a spoon. Practice this base with chicken tikka masala, paneer makhani, and dal makhani to build confidence.
Perfect coconut milk curries from South Indian cuisine
South Indian coconut curries offer a completely different flavor profile that balances heat, tang, and creaminess. Start with Kerala fish curry, which teaches you how coconut milk behaves under heat. Unlike dairy cream, coconut milk can separate if boiled too vigorously, so maintain gentle simmering temperatures.
Learn to create coconut curry bases using fresh grated coconut or thick coconut milk. The traditional method involves grinding coconut with green chilies, ginger, and curry leaves to create a paste. This technique works brilliantly for avial, a mixed vegetable curry that showcases coconut’s versatility.
Master the art of tempering with South Indian spices. Heat coconut oil, add mustard seeds until they splutter, then curry leaves, dried red chilies, and asafoetida. This aromatic base transforms simple vegetables into complex, layered dishes. Practice with sambar, rasam, and coconut-based fish curries to understand how tamarind, jaggery, and coconut milk create perfect balance.
Prepare dry vegetable dishes and stir-fries
Dry vegetable preparations, known as sabzi, form the backbone of Indian home cooking. These dishes rely on precise heat control and timing rather than liquid-based gravies. Start with aloo gobi, which teaches you how different vegetables cook at different rates. Cut potatoes smaller than cauliflower since they take longer to cook through.
Master the technique of bhuna, where spices and vegetables are cooked together without liquid until they release their natural oils. This method creates intense, concentrated flavors that define excellent dry curries. Practice with bhindi masala, where okra must be cooked properly to avoid the sticky texture that beginners often encounter.
Learn regional variations like Bengali-style vegetables with panch phoron (five-spice blend) or Gujarati-style preparations with jaggery and tamarind. Each style teaches different approaches to balancing sweet, sour, and spicy elements without relying on heavy gravies.
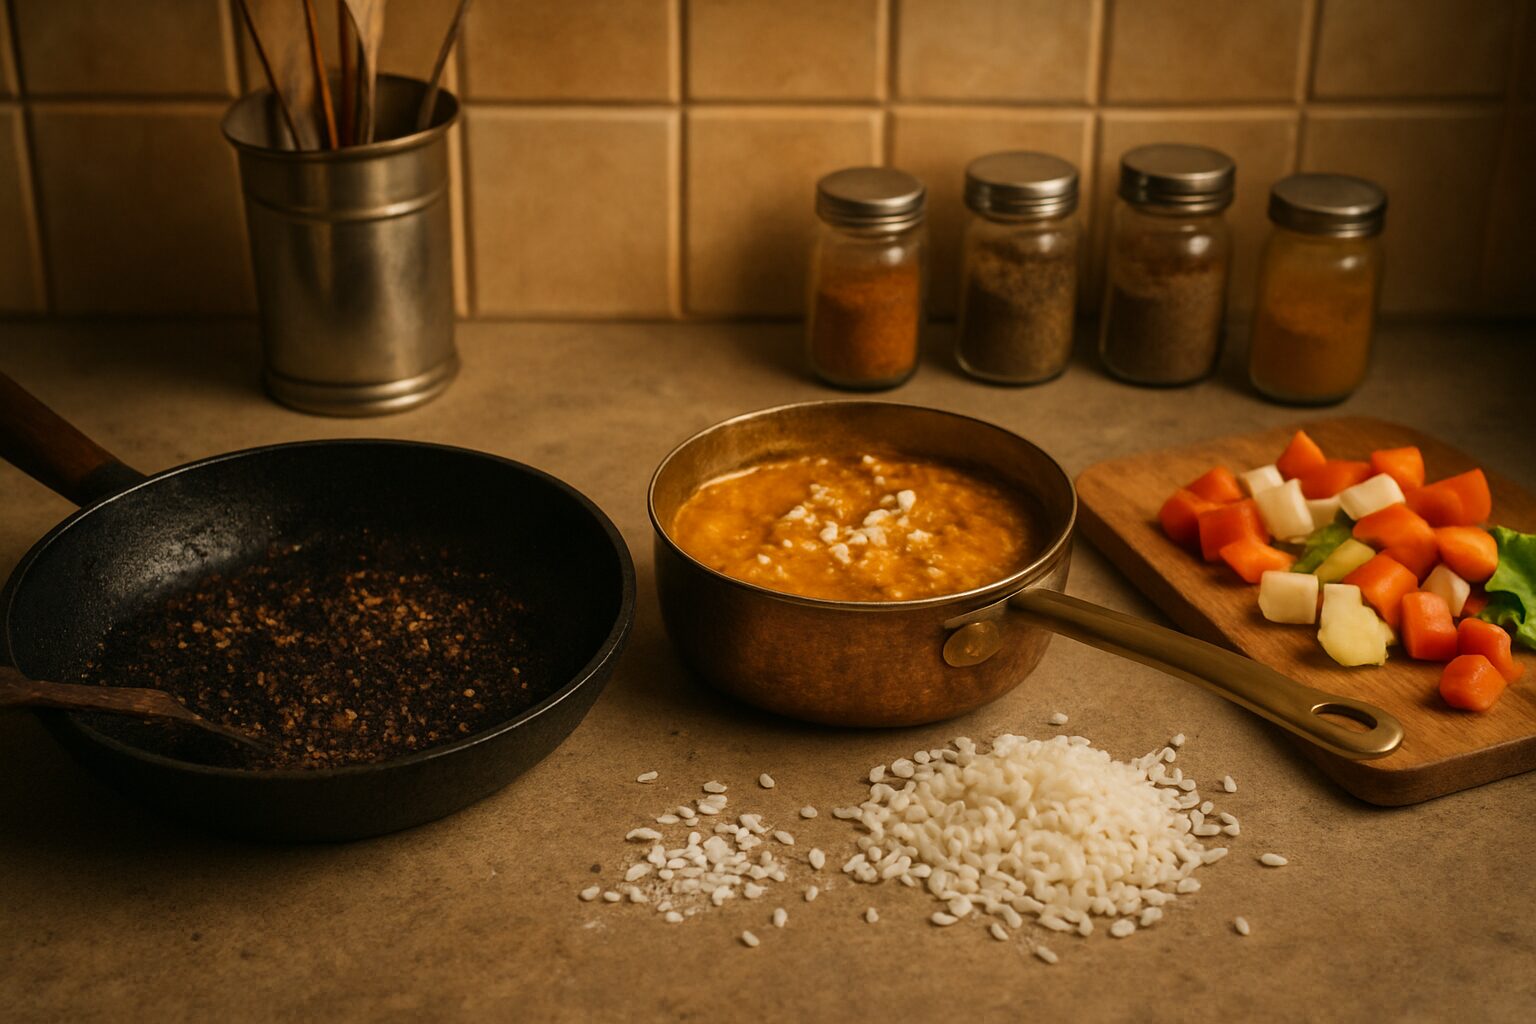
Cook protein-rich dal varieties with perfect consistency
Dal mastery separates confident Indian cooks from beginners. Start with basic toor dal, learning how split pigeon peas behave when cooked. The perfect dal should be creamy but not mushy, with individual lentils still visible but completely tender.
Understanding water ratios proves crucial for dal success. Different lentils require different liquid amounts – moong dal needs less water than chana dal, while masoor dal cooks fastest of all. Create a simple tempering with cumin seeds, ginger, and green chilies to build your foundation.
Progress to more complex preparations like dal tadka, where the tempering is added both during cooking and as a final garnish. This double-tempering technique creates layers of flavor that transform humble lentils into restaurant-worthy dishes. Master sambar, which combines lentils with vegetables and a complex spice paste for South Indian authenticity.
| Dal Type | Cooking Time | Water Ratio | Best Uses |
|---|---|---|---|
| Toor Dal | 20-25 min | 1:3 | Daily meals, sambar |
| Moong Dal | 15-20 min | 1:2.5 | Light dinners, khichdi |
| Chana Dal | 30-35 min | 1:3.5 | Hearty meals, Bengal gram curry |
| Masoor Dal | 15-18 min | 1:2.5 | Quick meals, red lentil curry |
Make tangy and spicy regional specialties
Regional specialties showcase India’s incredible diversity and teach advanced flavor balancing. Start with Goan vindaloo, which demonstrates how vinegar and palm jaggery create complex sweet-sour-spicy profiles. This dish teaches patience, as the flavors need time to meld together properly.
Explore Rajasthani laal maas, where dried red chilies and yogurt create fiery yet balanced heat. This preparation shows how dairy can cool intense spice levels while adding richness. The technique of roasting and grinding whole spices for fresh masala pastes elevates your cooking dramatically.
Practice Tamil-style Chettinad chicken, famous for its bold spice blends and coconut-based gravies. This cuisine teaches you to handle multiple whole spices and achieve perfect balance between heat and flavor. Each regional specialty adds new techniques to your repertoire, from Bengali mustard-based curries to Punjabi robust gravies heavy with onions and tomatoes.
Develop Your 30-Day Practice Schedule

Follow Structured Daily Cooking Assignments with Increasing Difficulty
Your journey begins with simple single-ingredient preparations and gradually builds to complex multi-component dishes. Start your first week with basic spice tempering (tadka) exercises – heat oil, add cumin seeds, listen for the sizzle, and smell the aromatic release. Practice this daily until you can achieve consistent results without burning.
Week two introduces one-pot dishes like dal and simple vegetable curries. Focus on mastering heat control and timing. Cook the same dal recipe three times, adjusting water ratios and salt levels each time. Document what works and what doesn’t.
By week three, you’ll tackle two-component meals: a curry paired with rice or flatbread. Challenge yourself with dishes requiring multiple cooking techniques, like aloo gobi (which combines sautéing and steaming) or chicken curry with homemade roti.
The final week pushes your boundaries with elaborate dishes requiring precise coordination. Prepare complete thali-style meals with multiple curries, fresh bread, and accompaniments. Each assignment builds specific muscle memory and confidence in Indian cooking fundamentals.
Track Your Progress with Skill-Building Milestones
Create a simple checklist system to monitor your developing abilities. Week one milestones include perfect spice blooming without burning, consistent dal texture, and basic knife skills for Indian vegetable cuts.
Week two benchmarks focus on flavor development: achieving proper onion browning stages (from translucent to golden to deep brown), balancing salt and acid in curries, and timing multiple dishes to finish simultaneously. Rate your confidence level from 1-10 for each skill.
Third-week goals include mastering bread consistency, understanding curry thickness adjustments, and developing your palate for spice combinations. Keep notes about which flavor profiles work best for your taste preferences.
Final week milestones center on advanced techniques: layered biryanis, complex gravies, and regional specialties. Track your speed improvements and recipe modification successes. This milestone system keeps you motivated and highlights areas needing extra practice.
Plan Weekly Meal Prep Sessions Using Learned Techniques
Dedicate Sunday afternoons to batch cooking using your newly acquired skills. Week one prep focuses on spice blends, pre-chopped aromatics, and basic dal preparations that improve with time. Store these foundation elements for quick weeknight cooking.
Week two sessions expand to curry bases and partially cooked grains. Make large batches of tomato-onion base (pyaz-tamatar), freeze in portion sizes, and use throughout the week for different curries. This technique saves time while reinforcing proper base preparation.
Advanced meal prep includes marinated proteins, fresh spice pastes, and regional specialties that benefit from resting time. Prepare tandoori marinades, grind fresh masalas, and portion ingredients for complex dishes. Your prep sessions become more sophisticated as your skills develop.
Create Your Personal Recipe Collection and Modifications
Start a dedicated notebook or digital document from day one. Record every recipe you attempt, including your modifications, failure points, and successful adaptations. Note family preferences, dietary restrictions, and regional variations you discover.
Document your spice quantity preferences since heat tolerance varies significantly between individuals. If a recipe calls for two green chilies but your family prefers mild heat, note your successful substitution. These personal touches make recipes truly yours.
Include photos of successful dishes alongside your notes. Visual references help you recreate texture and color consistency. Add sourcing notes for specialty ingredients and acceptable substitutions you’ve tested. Rate each recipe attempt and note which versions become family favorites.
Track seasonal ingredient swaps and local availability adaptations. Your collection becomes a personalized Indian cookbook reflecting your journey, preferences, and growing expertise. This documentation proves invaluable as you continue developing your skills beyond the initial 30 days.
Troubleshoot Common Beginner Mistakes
Fix oversalted, oversweetened, or overspiced dishes
When your curry tastes like you dumped half the salt shaker in it, don’t panic. Add a peeled, quartered potato and let it simmer for 10-15 minutes – potatoes naturally absorb excess salt. Remove the potato pieces before serving. You can also dilute the dish by adding unsalted broth, coconut milk, or tomato puree, then adjust other seasonings accordingly.
For oversweetened dishes, balance the sweetness with acidic ingredients like lemon juice, tamarind paste, or a small amount of vinegar. Start with half a teaspoon and taste as you go. Adding a pinch of salt can also help counteract excessive sweetness.
Overspiced food requires immediate dilution. Double your base ingredients – add more onions, tomatoes, or coconut milk depending on your recipe. If the heat is unbearable, dairy products like yogurt or cream work wonders. Stir in a few tablespoons gradually until the spice level becomes manageable.
| Issue | Fix | Prevention |
|---|---|---|
| Too salty | Add potatoes or dilute | Taste before adding more salt |
| Too sweet | Add lemon juice | Use palm sugar sparingly |
| Too spicy | Add yogurt/cream | Start with half the spices |
Rescue burnt or undercooked curries and rice
Burnt curries can often be saved if you catch them early. Immediately turn off the heat and transfer the unburnt portion to a clean pot – never scrape the bottom. Add a slice of bread on top of the curry, cover, and let it sit for 10 minutes to absorb the burnt smell. Remove the bread and continue cooking in the new pot.
For undercooked curries, the meat or vegetables need more time to tenderize. Add hot water or broth (never cold liquid) to prevent the curry from drying out while it finishes cooking. Cover and simmer on low heat, checking every 15 minutes until the proteins are fork-tender.
Burnt rice needs the bread trick too. Place two slices of bread over the rice, cover tightly, and let it absorb the burnt odor for 15-20 minutes. If only the bottom layer is burnt, carefully scoop out the good rice from the top and sides, leaving the burnt layer behind.
Undercooked rice can be fixed by sprinkling a few tablespoons of hot water over the surface, covering, and cooking on the lowest heat for another 5-10 minutes. The steam will finish cooking the grains without making them mushy.
Adjust consistency and flavor balance in real-time
Getting the perfect curry consistency takes practice, but you can fix it while cooking. Thin curries need thickening agents – try tomato paste, ground cashews, or a slurry made from chickpea flour and water. Add these gradually while stirring to avoid lumps.
Thick curries are easier to fix – just add hot liquid slowly. Use the same liquid that’s already in your curry (coconut milk, broth, or water) and add it in small amounts while stirring. This prevents the curry from becoming watery and maintains the flavor concentration.
Flavor balance comes down to the five taste elements: salty, sweet, sour, spicy, and umami. If your curry tastes flat, it probably needs salt or acid. Bland curries often need more aromatics – try tempering whole spices in hot oil and adding them to the dish.
Quick flavor fixes:
- Lacks depth: Add garam masala or a bay leaf
- Too acidic: Balance with a pinch of sugar
- Missing brightness: Squeeze fresh lemon juice
- Needs richness: Stir in a tablespoon of cream or butter
Keep tasting every few minutes during the last 10 minutes of cooking. Small adjustments work better than large ones, and remember that flavors intensify as the curry sits and cools slightly.
ZBuilding your Indian cooking skills doesn’t have to be overwhelming when you break it down into manageable weekly goals. By stocking up on essential spices, mastering basic techniques, and practicing different curry styles over 30 days, you’ll develop the confidence to create authentic Indian meals at home. The key is starting with simple recipes and gradually building complexity as your palate and skills develop.
Your journey to Indian cooking mastery starts with taking action today. Pick three essential spices from your arsenal list, choose one basic technique to practice this week, and commit to cooking one Indian dish. Remember, every expert was once a beginner, and the mistakes you’ll make along the way are just stepping stones to becoming the home cook you want to be. Your taste buds and family will thank you for embarking on this flavorful adventure.
Leave a Reply